


Braidless Sew-In, What Is It?

As a girly who loves trying out different styling methods to keep my natural hair healthy, I came across a sew-in option that causes no damage, leaving my hair fuller and gorgeous at the same time.
It's the braidless sew-in.
Many of us are accustomed to the traditional sew-in method, which involves braiding the hair in cornrows and attaching the weft hair extensions with threads and a needle.
However, it's not a secret that this method may cause discomfort if not cared for properly, leaving us feeling sore for a short while and, in some cases, even causing breakage after removal.
Now, here's a chance for change with the braidless sew-in. I can say I never looked back after discovering the style, which is why I bring it to you in this article.
What is the braidless sew-in? Let's get to know about it, shall we?
What is a Braidless Sew-In?
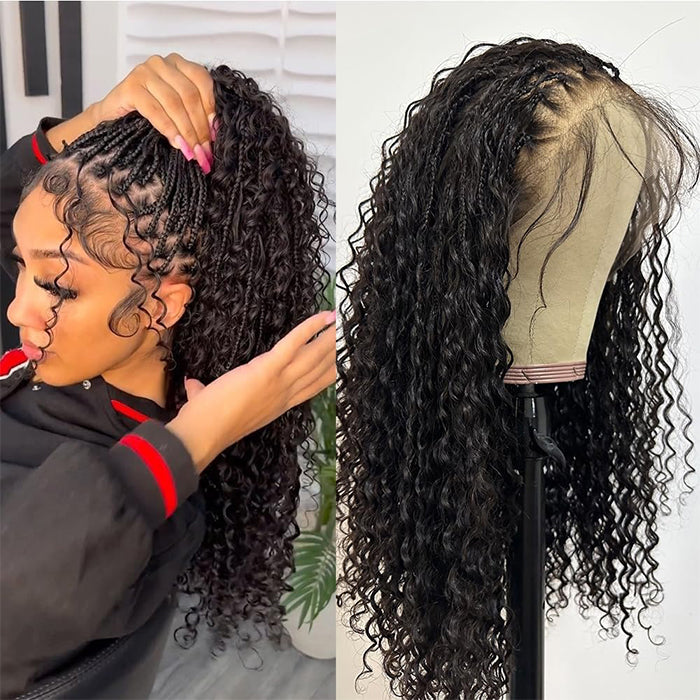
From the name, you can already imagine that the braidless sew-in is a style that won't involve putting your natural hair in cornrows as the base or foundation for the wefts.
If you guessed that, you're correct!😉

Instead, it utilizes small, silicone-lined beads to secure the hair extensions to your natural hair, resulting in a natural and gorgeous look.
The braidless sew-in is a lightweight option that allows your hair to breathe, even after the hair extensions are attached.
👉Note: Because your natural hair carries more weight in this method, the quality of the hair extensions matters even more.
Tired of bulky braids and tension on your scalp, want a fabulous style without any strain to the hair? This is it. You simply apply the beads and sew the wefts to your natural hair. The result? A flat, versatile, and natural-looking style.
Braidless Sew-in vs Regular Sew-in: What's the Difference?

In case you're asking, “What is the difference between a braidless sew-in and a sew-in?”
Well, it is in the way the sew-in style is achieved. In simpler words, while you need to braid your hair for a regular sew-in, you skip the braids with the braidless sew-in and use beads instead.
Reasons Why You Should Choose the Braidless Sew-In

Women with sensitive and soft scalps might find the traditional sew-in uncomfortable due to the tension on the scalp, but a braidless sew-in puts your mind at rest. This makes the braidless sew-in a better alternative.
Let's see the reasons why you should choose a braidless sew-in (in this case, whether you have a sensitive scalp or not).
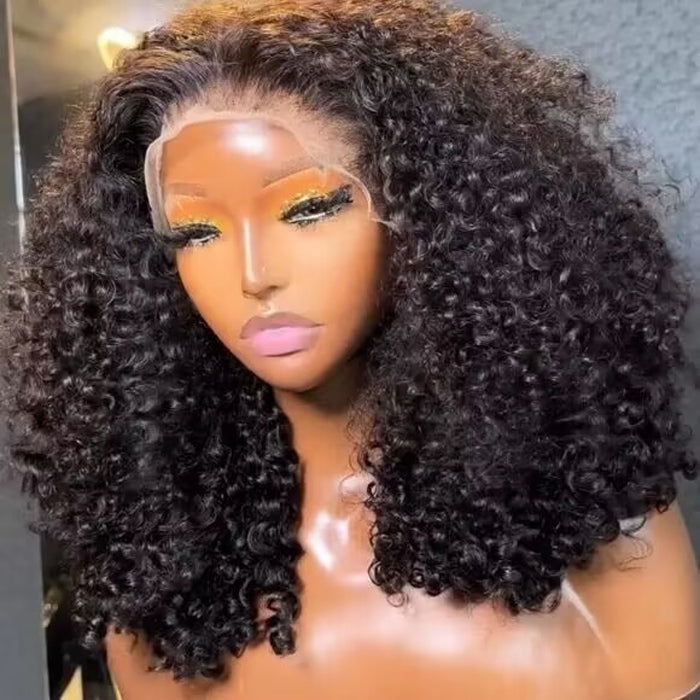
1. It is Versatile
One thing I love so much about the braidless sew-in is the fact that you can style it in multiple ways. If you've dreamed of wearing your sew-in in many ways, try the braidless sew-in. It is more flexible since there are no braids as a foundation.
You can style it any way you want, putting it in a ponytail or leaving it to flow. The tracks won't be exposed, and it looks really good.
2. Comfortability
Have you ever thought the tight feeling you get after styling the traditional sew-in won’t go away? That's wrong.
With a braidless sew-in, you can enjoy as much comfort as you need. There will be no tension or strain after styling, which is a big reason I won't stop choosing the braidless sew-in.
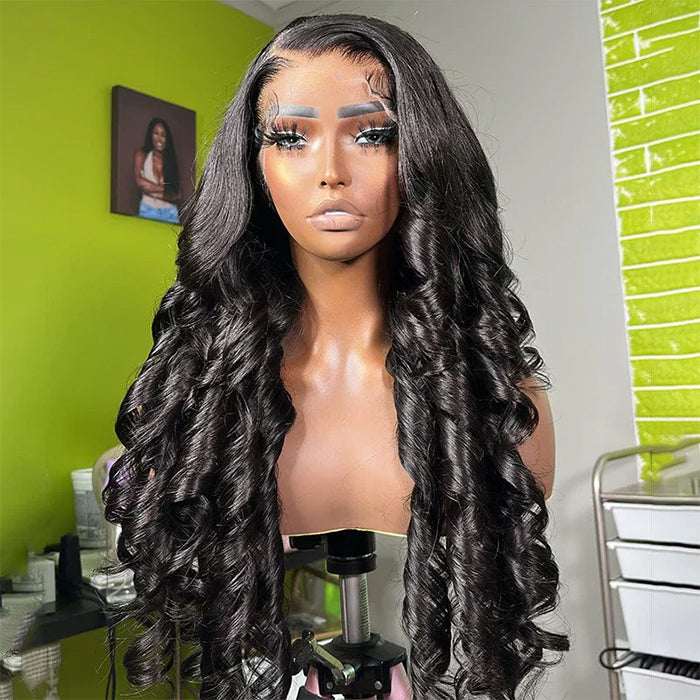
3. It looks Natural
Braidless sew-in has a natural look because of the method of installation. The wefts do not appear bulky; instead, they lie flat, making the extensions blend with your hair.
Imagine if you choose a color of hair extensions that matches your natural hair, then you're in for a treat. It will be absolutely gorgeous.
4. Can last long
You may be thinking the braidless sew-in won't last long, as the traditional sew-in does. However, that's not entirely true. As long as you care for your hair, your braidless sew-in can last up to 10 weeks.
In other words, you can enjoy a beautiful hairstyle without irritation, discomfort, or tightness for more than two months. Just be sure to care for your sew-in properly.
5. It leaves your hair with no damage
The traditional sew-in may tug on your hair, leading to breakage and hair loss. However, braidless sew-ins are gentle on natural hair. They do not tug on the natural hair nor cause tension on the scalp.
The Potential Risk of Braidless Sew-in
If you use the incorrect way to do a braidless sew-in, your natural hair may break, and your scalp can get hurt.
⚠️If you put much more hair than your base hair, you can still get tension from the braidless sew-in.
⚠️If your natural hair is too weak, this incorrect method may make it weaker.
Pro tips: A braidless sew-in only works well when both the technique and the hair are right.
What Hair Works Best for a Braidless Sew-In?

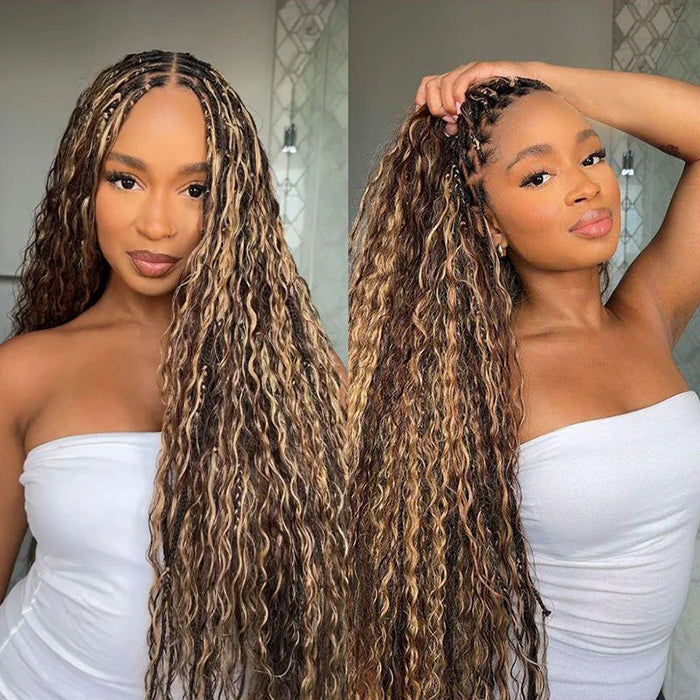
For a flawless braidless sew-in, 100% premium virgin human hair bundles are most girls' choice. They blend well with your natural hair, versatile and flexible. The result? Flat and super Natural!
One thing we often tell customers is not to over-pack bundles for braidless sew-ins. Choosing fewer, higher-quality human hair bundles usually leads to a flatter, more comfortable result.
How Many Bundles Do You Need for A Braidless Sew in?

It depends on the hair length and fullness you want.
In general,
✅For shorter hair length under 16”, 2 bundles are fine.
✅For mid-length 18"-22”, 3 bundles are enough.
✅For lengths over 22”, 3 or bundles are needed.
✅If you want a fuller look, add 1 more bundle.
The braidless sew-in is a bit technical to achieve. This is not to say you can't style it on your own. Here are the steps you can follow when installing a braidless sew-in:
How to Achieve a Braidless Sew-In?
1. Get What You Need for Styling

There are a few things that make achieving a braidless sew-in easier. They include hair pliers, silk threads, needles, a loop hook, silicone beads, and, of course, your hair bundles.
Gather what you need to style, then proceed to styling.
2. Prepare Your Natural Hair

Before you start attaching the wefts to your hair, your natural hair needs a little preparation.
While you don't have to do anything serious, you need to wash it to remove any product buildup, then blow-dry it.
Blow-drying your hair helps give it some kind of texture that makes the beads stay. It's even better if you wash your hair a few days before styling.
3. Divide Your Hair

Use a rattail comb to divide your hair in the middle or side from the rest of your hair. This is for the leave out.
Braid it to separate the section from the rest of your hair. You also want to cut out your hair at the front, sides, and back if you want to do a ponytail. Braid those areas as well.
Now start parting the sections to attach your hair extensions from the back.
A quick update: you can go for small or big sections, depending on the number of wefts you have and how full you want the style to be.
4. Go Ahead and Install Your Beads
Thread the loop hook with beads. Take a few so you don't have to pick again every time.

Now, create a part in your hair with your rattail comb in the section you've just made and thread your hair through a silicone bead.

Go across that whole section and repeat the process by creating a part and putting your beads.
Close it with the hair pliers, but make sure they are not too tight to irritate.
👉Keep in mind that the beads should be near but not at your root to avoid stressing your scalp.
5. Sew Your Wefts

Take your wefts, double them, and sew them to your natural hair. Let your needle and thread pass through the beads for a snug appearance.
Although the braidless sew-in is usually flatter than the regular sew-in, attaching it properly also helps to give it that look.
Divide another row, this time, a bit thinner, then attach your beads. Go over all the steps, sewing your wefts from one side to another. Continue with these same steps till you’re done with your hair.
If you'd love to create styles like the half-up, half-down, make sure to leave your natural hair in between some rows.
6. Get Set to Style

Loose the leave out in the middle or side and the perimeter. Brush it all together and style as you wish. You could add curls, put it up in a ponytail, or go for any style you've got your eyes on.
How Long Does a Braidless Sew-In Last?

A braidless sew-in can last for up to 10 weeks. But it depends on how you care for it, just like any other hairstyle.
It's common knowledge that hairstyles that are properly cared for last longer than those that aren't. Your natural hair also tends to prosper as it won't break or get damaged due to a lack of care.
Tips for Caring for Your Braidless Sew-In
As much as I'll love you to care for your hairstyle, there's the right way to do it. Check out a few tips on how to care for your braidless sew-in in this section.
1. Do not manipulate often
I try to avoid manipulating my hair more than necessary. This includes combing or brushing my sew-in all the time.
What I adopted instead was putting it in protective styles after combing once to avoid tangling or tugging on the sheet when sleeping. This way, my hair isn't stressed, nor will I pull on the wefts more than I need to by combing regularly.
2. Moisturize Properly
Apply a moisturizer to the mid-length and ends of your hair. Make sure the moisturizer is light so it doesn't weigh your hair down.
3. Wash with the Good Products
Although washing isn't a must, if you need to wash your hair, use products that do not contain sulfates. Also, focus on cleaning your scalp or areas that are dirty, and be careful around the beads.
Once you wash, dry properly and completely, because you don't want to leave it damp.
Want Easy Options?
If you love the sew-in look but want something removable, glueless wigs or U/V-part wigs offer a similar finish with less long-term commitment.
Final Thoughts
Braidless sew-in is a lightweight protective style. It is long-lasting, tension-free, and versatile.
When uninstalling, be careful to avoid pulling or cutting your hair, as most damage comes from not removing it properly or installing it incorrectly. I'll advise that you visit a hairstylist once it's time to uninstall it. They can do it properly for you.


Leave a comment