


Master Finger Coils: Your Go-To Guide for Perfect, Defined Curls

Finger coils are a very popular styling technique for our natural hair, which generates long-lasting and defined curls to make your look more pleasing. With the right touch and technique, it delivers unique, bold, and defined curls that stay in place throughout the day without frizz. Yet even a small misstep can throw off your balance or leave your look dull.
With daily practice and tolerance, anyone can perfect this technique and achieve his dream coils. Whether you're a seasoned pro player or have just started, finger coils can be easily achieved on any hair length or type, even with a wig.🤗
Now that you are willing to do this on your own, we have the step-by-step processes of achieving this beautiful hair!
Let's get into it!✍️
What are Finger Coils?

Finger coils refer to a type of curl or a popular hair styling technique that involves twisting your locks in small parts to create defined and stunning spiral curls. The best hair for this technique is wet hair, and you can accomplish it easily using a simple comb or fingertip.
Since it is universal and works with anyone who has any kind of hair, finger coils can be done on both relaxed and natural hair. This type of wave has proved to be a favorite for its remarkable ability to produce stunning shining curls and easily transform to suit any length or texture of hair.
Products You'll Need to Make this Gorgeous Style
Creating finger coils always requires the use of suitable products to maintain their shape and design. There are a few essential tools to ensure your coils come out perfectly:
1. ✨Curl Enhancing Cream

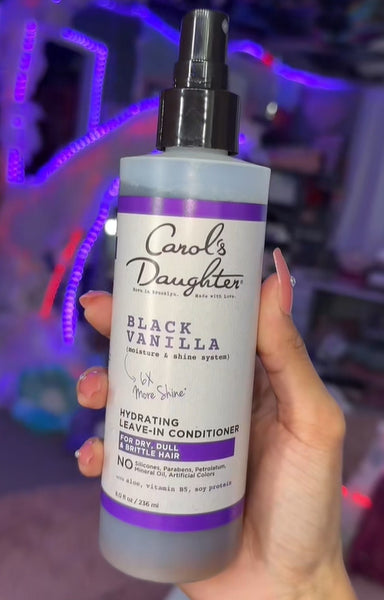
Search for a formula that is specifically made for natural hair and will enhance curl pattern, combat frizz, and allow you to keep your coils moisturized, bouncy, and intact the whole day.
2. ✨Wide-Tooth Comb for Detangling Hair

A wide-tooth comb creates a smooth detangle with less breakage. For the best effects, before using products, detangle them with a comb or brush so you can use the products with less damage to achieve silkier hair.
3. ✨Weightless Styling Gel

A weightless styling gel sets finger coils in place without weighing curls down, adding definition and bringing the frizz. Its lightweight keeps the style fresh longer, protecting curls all day from hardness.
3. ✨A hair dryer with diffuser attachment

A hairdryer with a diffuser is one of the most vital tools for creating defined and springy curls. A diffuser makes ringlets frizz-free, amplifying your own hair pattern and it's ideal for pleasing cinches.
4. ✨Water spray bottle for styling

A spray bottle is a versatile hair tool, perfect for hydrating hair with water or conditioner. For better hold, mist lightly before styling for long-lasting results.
After knowing and learning everything about finger coils now, there is a step-by-step process on how to achieve this incredible and beautiful style.
Master the Finger Coiling Technique: A Step-by-Step Guide

Mastering finger coils is easy, whether you want loose waves or tight coils. This method will assist you in making your hair look bold and beautiful.
To know how to apply the finger coiling technique, and to know all about your hair, read this step-by-step tutorial:
Step 1: Clean and Condition Your Hair

The best time to do perfectly defined finger coils is wash day. You will be starting with clean curls that are in a position to flourish.
- Start by washing your hair with a sulfate-free curly cleanser, which will gently cleanse the product build-up, excess oils, and impurities from your curls; while still capturing the curl definition and moisture of your curls.
- Lastly, you will use a very nourishing, hydrating conditioner to condition your curls and improve hair elasticity. This special cleaning and conditioning of your hair care rule not only prepares your hair for styling but also extends the useful life of your finger coils.
Step 2: Detangle and Apply Leave-In
After cleaning your hair with mastery, now apply your special leave-in conditioner.
To do that process in simple steps first detangle your hairs and use a hair comb from end ups to roots. This will help exclude knots and confusion, leaving your ringlets smooth and uniquely defined. Proper detangling also ensures you spread leaves in conditioner and prepares your hair for coiling.
Step 3: Section Your Hair

Begin by sectioning your hair into several tiny sections and tie them up with hair clips. The thickness of each section also varies with the thickness of your hair and the style of ringlet you desire. For tighter and more compact curls, smaller sections always prove themselves best for any occasion.
Remember, many times, wet hairs may appear thinner, but they gain volume as they dry. Taking the time to section your hair also ensures you a more defined approach, which helps you to produce a harmonious and polished look.
Step 4: Coil Your Curls
When it comes to coiling your hair, there are two methods in general: with one finger and with two fingers. Apply curl cream before we start coiling.
Method 1: With one finger
To make your curls coils, first, take a piece of your hair from the section and brush, then coiling by holding the hair roots with your index finger. Coil the strands carefully from the roots all the way to the tips and release.
Method 2: With two fingers
@zanysena In love :) #hair #longhair #hairtutorial #hairstyles #fingercoiling #curlyhair #curlyhairroutine ♬ L’AMOUR DE MA VIE - Billie Eilish
Pull the small section of hair straight out, wrap the end of the hair around a finger, add another index finger, keep rolling the hair with your fingers till the hair roots, and release.
In order to get still more defined coils, please keep them in position for five seconds before releasing them. Repeat this with every section and subsection of your hair, and regular care also makes your coils look more refined.
Step 5: Set with Gel

After coiling all sections and subsections now, lightly apply a weightless gel to the strands to enhance the definition and hold. Always use a quality gel, as it will keep your curls intact and minimize the frizz as they dry.
Carefully use a gentle touch during this step to keep the coils that you have created. The gel does not only increase the life of your style, but it also helps a lot to maintain your style throughout the day or even longer.
Step 6: Dry and Scrunch for Volume
To dry your finger coils, always use a diffuser attachment on low heat or just let your curls dry in the air for a gentle approach. The diffuser, especially when applied with a unique hover technique, also enhances your curl definition and brings out the best in your ringlets. Keep in mind your hair must be dehydrated to prevent unnecessary frizz.
Once your hair is dry, flip your hair upside down, gently scrunch the ringlets with your hands, and use light oil to make the curls shine multiple times more. In the final step, use a gel cast, which adds a touch of shine and generates a naturally voluminous and bouncy finish in your finger coils.
Pro Tips for Long and Lasting Finger Coils

Proper application and care routine give you perfect, long-lasting finger coils. From prep to styling, add these tips to your routine to raise your coil game to the next level and keep your curls thriving. So, let's get into essential tips that get you perfect coils every time:
1. Hydrate Your Hair Regularly
Keeping hydrate your curls is the key to making them last long and defined. Always use a leave conditioner or any coil cream with a hydrating component. Deep condition your hair at least once a week to restore humidity, form blankness, and maintain wimpiness. This routine protects beaches from damage while enhancing shine and manageability.
2. Protect Your Curls Overnight!
To reduce splitting curls and keep your hair from being damaged while sleeping, use a soft silk pillowcase to maintain your coil's shape overnight. You can also tie your hair up into a loose pineapple, or you can also wear a bonnet to save your curls overnight.
3. Use the Right Styling Products
Choose the styling products that are perfectly well suited for your curl type and boost your confidence. Use such as gel, creams, or mousses. Always apply them to dampen your hair and rake them through your fingers to ensure the distribution and definition of curls.
4. Avoid Heat Where Possible
Minimize heat exposure to prevent any kind of heat damage and maintain your curl's health. Air drying also works best, but always use a diffuser attachment on low heat settings to protect your finger coils from excessive heat.
5. Refresh Between Washes
Always revive your coils between wash days by spritzing them with water or leave in a conditioner mix. To make your finger coils bounce and define back, scrunch some lightweight curl cream or mouses into dampened strands.
6. Trim Regularly
Split ends can make your curls lose definition and be frizzy. It is advisable to book a trim every 6 - 8 weeks to keep your hair healthy, protect your coil shape, and promote growth. Your Healthy hair always makes the curls shape better and boosts your confidence in any place.
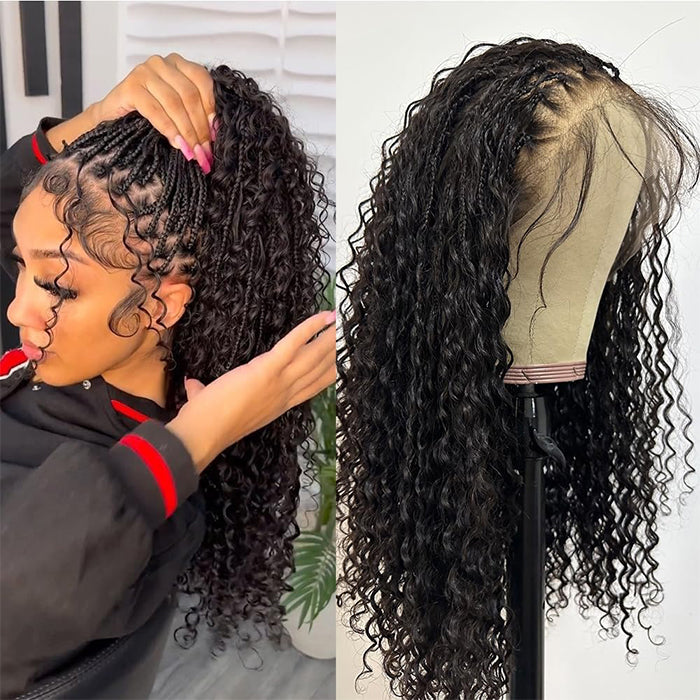
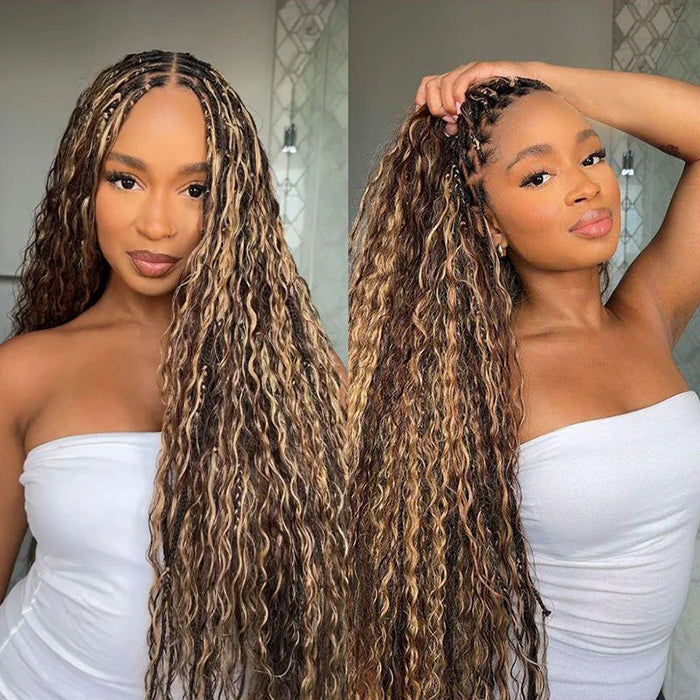
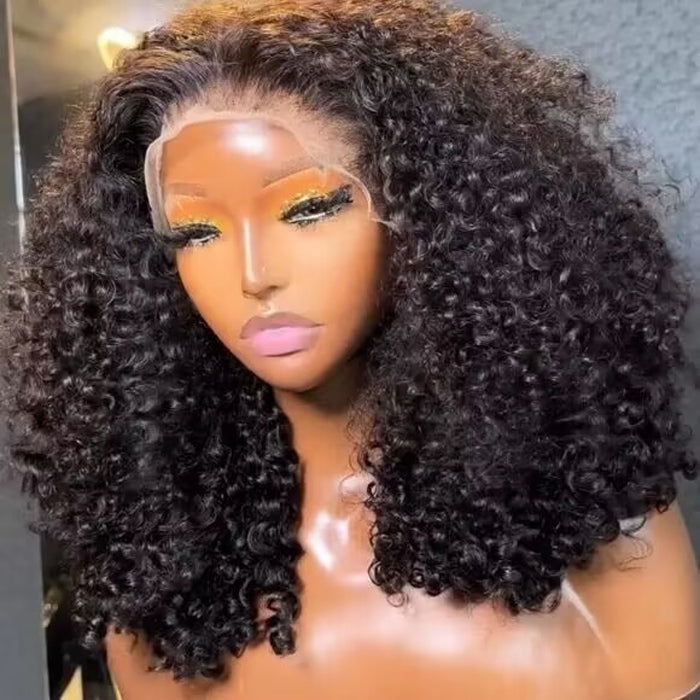
Hermosa Hair Finger Coil Wig

In a Nutshell
Finger coiling is an amazing styling method for getting neat, long-lasting curls that beautify your natural hair. With the proper products and curl-defining creams, you can get this perfect, frizz-free look. The easy, step-by-step procedure, from washing to coiling and using gel, provides glossy finishes to any type of hair.
To maintain your coils, prioritize hydration and protect them from random washes. Regular trims and minimal heat exposure also help preserve curl definition and health. With patience and practice, anyone can master finger coil, bouncy curls that turn heads. Ready to try it? Embrace the technique and enjoy stunning, salon-worthy results at home!


Leave a comment