


How To Cut A Wig?

Do you have a wig you would like to cut to make it more natural or just want to switch up to a new style? Whether you have a human hair wig or synthetic wig, well, we’ve got the answers on how you can cut it.
We are ecstatic after getting ourselves the dream hair we’ve always wanted. But seeing it’s not what we’ve imagined can be disappointing. If you are in such shoes, don’t be sad. You can achieve the desired look you want.
There are other reasons why you may want to cut a wig. Due to damage, styling, etc. Whatever the reason is, this post will tell you how to go about it.
First, let's see the tools you will need to easily cut a wig.
Tools You Will Need When Cutting a Wig
Surprisingly, the tools you need to get are few to cut a wig. In most cases, you only need a wig stand, comb, and a shear.

Depending on what you wish to achieve, you may need other tools and products listed below.
1. Scissors or shears
2. Comb
3. Wig Stand
4. A clipper
5. A razor comb or thinning shears
6. Rat tail comb
7. Tape rules
8. Hair tie
9. Hair straightener
10. Hair clips
11. Heat protectant
Now that we have all the tools needed to cut a wig, let's now cut a wig.
How to Cut a Wig? Three Different Ways

There are different ways to cut a wig. Again, this depends on the style you want to achieve by the time you are done cutting. You may love to add layers to a wig, bangs, fringe, or cut a wig to a shorter length. Some people may also trim a wig to remove the damage hair, flattering face shape etc.
For a flattering result, the same process is not necessarily the answer. While they might be similar, we won’t advise you to follow the same steps.
So, let’s take each one at a time and see how to cut these styles separately.
Cutting a wig is easier than it may seem. This is regardless of the style modification you choose to make. When cutting, only be precise and patient.
How to Cut a Wig Short?
When going for a shorter length, the easiest way to cut it is with a clipper. You can achieve a straight, smooth, and fine bob when you use that. However, if you do not want it straight, you won't need a clipper. There are other methods you can use. See that in how to trim a wig to add layers.

But first, let's start with how to use a clipper to cut a short bob wig.
Step 1: Place your wig on a wig stand and clip it. Make sure it's straight and pinned. You don't want it slanted or shaking when you start cutting.
Step 2: Comb the wig very well. You don't want a strand shorter or longer by the time you are done. You can use your hair stretcher to stretch the hair as well. But while you are cutting, keep combing as you work on the wig.
Step 3: Get your tape rules and pin it across the two sides. Pin the first by the left side of the wig, and the other by the right. This is to ensure that you cut on the inch you want to. It lets you know if the hair is straight as well. But if you can't get two, you can utilize one. Pin that one on the face of the mannequin.
Step 4: Now, ready your clipper and start to cut. We advise that you start an inch lower than the length you want. If there are a few errors, it will be simple to make modifications because of this. That's better than a shorter wig, right?
Step 5: With the clipper, work from one side of the wig. Then, move to the other side and cut. Don't be scared. Using a clipper is the easiest way to cut a bob wig.
Step 6: After cutting both sides to the back, adjust your wig tripod to see if it's equal. If there are uneven sections, follow the previous length and cut. Just be sure everything is equal and looks good.
Step 7: Good job so far! You are almost there. Now, with a shear, clean out the ends of the wig. Section with your hand, and cut those little pieces away.
And that's it! Your bob wig is nice and clean. Here is a detailed video on how to achieve a perfect result!
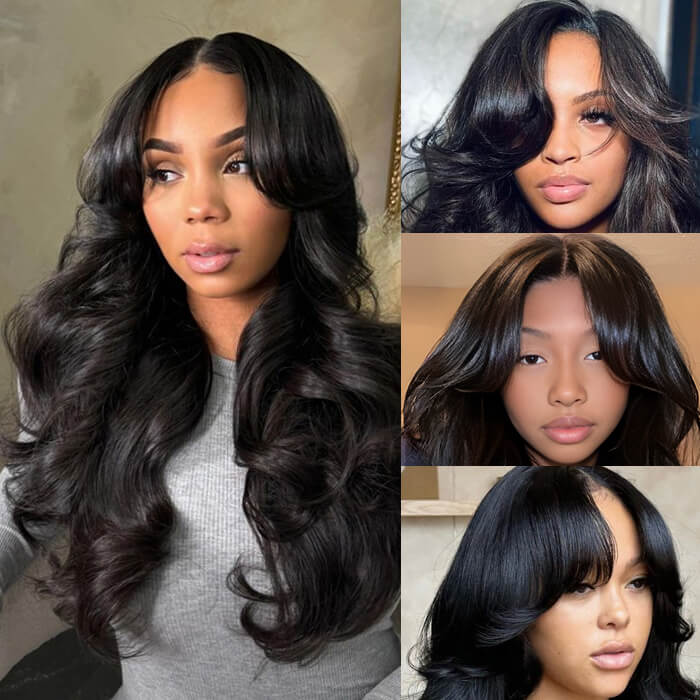
How To Cut Bangs on a Wig?
Bangs have a way of changing one's look. It takes a wig from average to stunning. To cut bangs on a wig is quite easy. You'll need a shear, parting comb, head tie, comb, and heat comb.

If you have the tools ready, follow these steps:
Step 1: Secure your wig. You can either wear it or place it on a wig stand. Then, pin it or use a wig grip. That's to prevent it from moving while you work.
Step 2: Section the area. You can cut out the area with a parting comb. Remember that you should begin sectioning with thinner rather than wider parts. This is because wide areas get wider.
Step 3: After sectioning, gather the hair you are working with and twist it. Another way is to use a head tie. Wrap it up and cut below. Likewise, for the twist, you'll want to cut below the twist. (You should add an inch to the length of the bang you want).
Step 4: Next, you want to remove the head tie (if you used one) and comb. If there are a few unequal strands, cut them with a shear.
Step 5: Then, use the heat comb to stretch the hair outward to give it that bang look.
Step 6: If you want the ends to be wispy, pick up your shear again and work through the ends with it. You'll be amazed by the result.
Step 7: Lastly, use your heat comb to stretch out your bangs once more. And there you have it! A fine-looking bangs.
How to Cut Layers into a Wig?
Adding layers to a wig beautifies the wig unit and gives it more volume. You can add layers to both curly and straight hair. Both look amazing and are easy to achieve.

For straight hairs:
Step 1: You'll want to place your wig on a stand or your head. Both work fine. Then, pin it down to avoid movement while you are working.
Step 2: Next is to section the hair. To begin, section into two parts. That's the left and the right side.
Step 3: Move further and section the left side into different parts. You can take them row by row and clip them down. That will be much easier to work with. Then, do the same with the right side too.
Step 4: For this part, you'll need thinning shears or a razor comb cause it is time to start layering. Pick the first part you clipped, comb it out, and get to layering.
Step 5: Before you go in with the thinning shears or razor comb, you want to know where to start from and the difference in inches between the layers. For instance, between the back of the wig which should be longer, and the next section, you can keep it at 2 inches.
Please know that it depends on what you want.
Step 6: Keep your tool angled and work from where you want to start to the tip of the wig. Now, start with the next layer. It shouldn't be the same length as the previous one. It's okay if it’s a little above it.
Step 7: Afterward, pick the next one and layer that as well. The front section will be the shortest. You can add more layers to the front section. Just make sure to style it how you want.
You’ll want to keep the length in mind. You don't want the layers to turn out equal.
Step 8: After working on the first side, move to the other side and repeat the same steps. Use your straightener to stretch the wig and see how well it turned out.
Here is a detailed video on how to achieve a perfect layered cut result!
@tymarrahgi Cutting layers on this reddish brown silky straight wig 🤭 #layers #cuttinglayers #silkystraighthair #wowafrican #faceframinglayers #middlepart #longhair #gluelesswig #fyp #fypシ゚viral ♬ original sound - Beyinternet
For curly hair:
You'll be using the same method as for straight hair. However, curl your hair before layering. That will give you an idea of where the layering will start and how you want it to look.
Tips That Help When Cutting a Wig
1. If you are a beginner, cut in sections. Sincerely, everyone finds it much easier to work in sections. It’s easy to find clips at stores. So, purchase as much as you like and leverage them. Cut those sections, clip them, and work bit by bit.
2. Get the right tools. You’ll be surprised as to how much the right tools can help. For instance, using small scissors for layering will be more helpful than using any other. With that in mind, you will want to get the right one. The same goes for other products.
3. Follow closely the steps above. You are less likely to make mistakes if you follow the steps listed.
Styling Made Easy
Undoubtedly, cutting a wig doesn’t only help repair damaged wigs, but it also makes styling easy. You can work through the wig and achieve the style you’ve always wanted. Ready for some styling? Follow our instructions above.herm


Leave a comment