


Beginner Friendly Bald Cap Method Lace Wig Install - A Comprehensive Guide

Have you ever considered utilizing the bald cap method to install a lace wig? It is an ideal way of achieving that natural look! With all the advances in hair extensions and wigs, we now have more options than ever before when it comes to styling our hair.
The great thing about this particular method is that not only can you install your chosen lace wig, but you also keep it looking as though the hair was growing out from your scalp naturally. Wig wearers often opt for this technique, as it is both reliable and unnoticeable.
Are you interested in learning how to install your lace wig? If yes, then this comprehensive guide is for you! Here, we will show you the step-by-step process of installing a lace wig using the bald cap method. We'll also cover what exactly a bald cap is and provide helpful tips on ensuring that your finished look appears as natural as possible. Plus, frequently asked questions are included, too, so don't hesitate to ask any queries you may have.
What Is The Bald Cap Method?
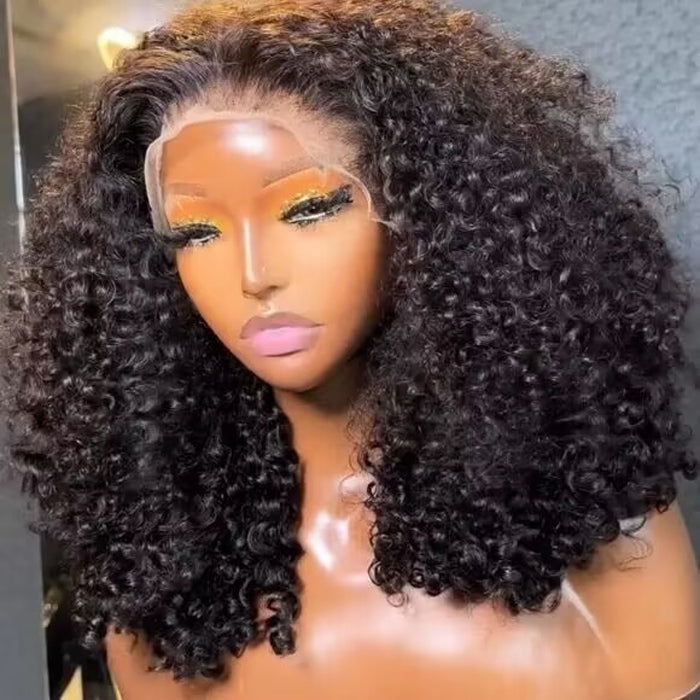
The bald cap method is an innovative technique of applying a wig cap that makes it appear just like your actual scalp. It's most commonly used with lace wigs, like lace front wigs, closure wigs, and full lace wigs. The bald cap can lay your hair flat on your head and give you a more realistic-looking when you install it properly. With the bald cap method, you don't have to worry about your hairline being visible as the wig is placed directly on top of it.
Why Do People Use The Bald Cap Method For Wigs?
The bald cap method for wig-wearers might sound unusual, but it is incredibly popular. This technique allows you to get the perfect fit with your wig, completely removing any issues due to varying head shapes and sizes. Plus, this ensures that your wig will lay flat against your scalp and create a seamless look that won't budge all day!
In addition, it can enhance the overall look of your lace wig. Not only will it make your hairline seem more genuine, but also reduces any gaps or openings between your scalp and wigs edge. This means that the worry of having to readjust throughout the day is rendered moot, as there won't be any shifting or slipping off from its original position!
Tools You Need For The Bald Cap Method
Are you ready to take the leap and get your supplies for the bald cap method? Look no further! To ensure success, make sure you have these items on hand:
A blow-dryer:

Before donning the bald cap, this step will dry your scalp and help guarantee a secure hold.
Hair glue or adhesive spray:

To ensure that your bald cap and wig remain securely fastened to your head, this will come in handy.
A skin-colored wig cap or stocking cap:

If you decide to go with a stocking cap, make sure it's a few shades lighter than your skin tone.
Small scissors:

Used to cut the excess wig cap and trim the edges of the lace.
Foundation in your preferred shade: Help to blend better with your scalp.
How To Install A Lace Wig Using The Bald Cap Method?
Although it may take a while, the bald cap method is easy to master once you understand how. Don't be intimidated if it takes some practice- just ensure that you devote enough time and attention when applying the cap. To help out, here are step-by-step instructions on creating an immaculate bald cap:
Step 1: Flatten and secure your natural hair
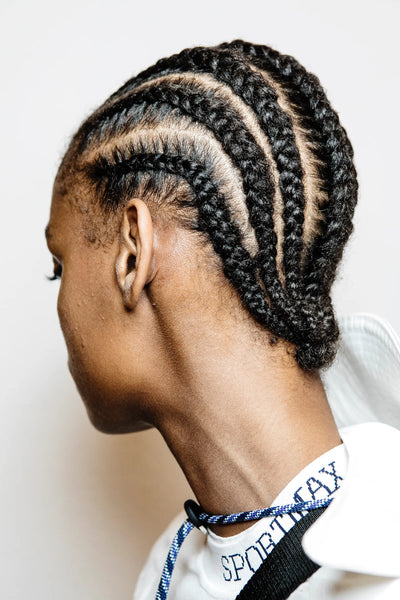
When you want to use a bald cap, the first step is always the same- flatten and keep your natural hair in place. It doesn't matter what technique or style you prefer; as long as it keeps your hair away from your scalp, it will work! Some popular methods include cornrows, braids, twists, low buns, and slicking back straight.
Step 2: Use an edge brush to brush your natural baby hair back

After your wig is perfectly arranged, use an edge brush to lightly sweep down the edges with edges control. This will not only keep everything securely in place but also eliminate any gaps between the wig and scalp for a more natural look. Although this step isn't necessary, it's highly recommended if you want truly seamless results!
Step 3: Get a wig cap or stocking cap that closes your skin color

Once your hair is prepped, it's time to select a bald cap that closely matches your skin tone. This will help create an even more realistic hairline and seamlessly transition from the wig to the skin - all at no additional cost or difficulty.
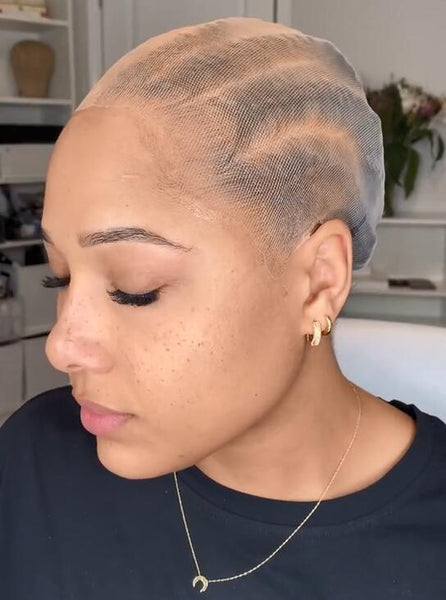
Step 4: Put on your wig cap or stocking cap:

With your wig cap on hand, carefully stretch it open and slip it over your head just like you would with a beanie. Ensure that the entirety of your scalp is covered, including the hairline, to create an even look. Your eyebrows should be visible but not protrude beyond the cap's boundaries.
Step 5: Cut a small hole just above each ear

Why should you cut holes in your bald cap? To make sure that it fits snugly against the head - and stays in place for long periods. After cutting small openings above both ears, gently thread your ears through until they're securely tucked away. For an even better fit, widen each hole as needed to ensure that your wig won't slide off.
Step 6: Locate your hairline and apply glue or adhesive spray

Once your wig cap is on and you've created holes in your ears, it's time to apply the glue or adhesive spray along the hairline you want to locate. This adhesive will help secure the bald cap in place, so it won't move around or come off during wear. Start by identifying the front of your hairline, then spread a thin layer of glue from ear to ear using the end of a brush. Make sure to apply the glue evenly and avoid getting it on your natural hair.
Step 7: Blow-dry the glue

Make sure your glue is evenly spread, and then use a blow dryer to activate the adhesive until it dries completely. With everything in place, let it air dry for an appropriate amount of time before moving on to the next step - just make sure everything is secure first!
Step 8: Cut off the excessive wig cap

Once the glue is dried completely, you can begin trimming away any material that is not glued. Begin at one of your ear holes and carefully cut along your hairline until all of the unglued pieces are gone. Employing a zig-zag motion will give you better results than cutting in straight lines across. When finished, make sure everything around your cap's edge is glued tight against your head.
Step 9: Apply foundation

Now that your wig cap is properly fitted apply a thin layer of foundation over the edge for a smoother finish. This provides an even more seamless and natural look and helps hide any remaining glue residue.
Step 10: Apply foundation to your wig's lace section for a perfect look

To achieve the most natural appearance with your lace wig, make sure to apply foundation on the lace area. Use a tiny brush or sponge for this task and work outwards until you get an almost invisible transition from skin to the wig. This will help in blending your wig seamlessly into your scalp resulting in a polished, finished look that is stunning!
If you're wearing a lace front wig, it is necessary to apply foundation across your whole hairline in front. But if you go with a closure wig, simply concentrating on the crown of your head where the lace shows will suffice.
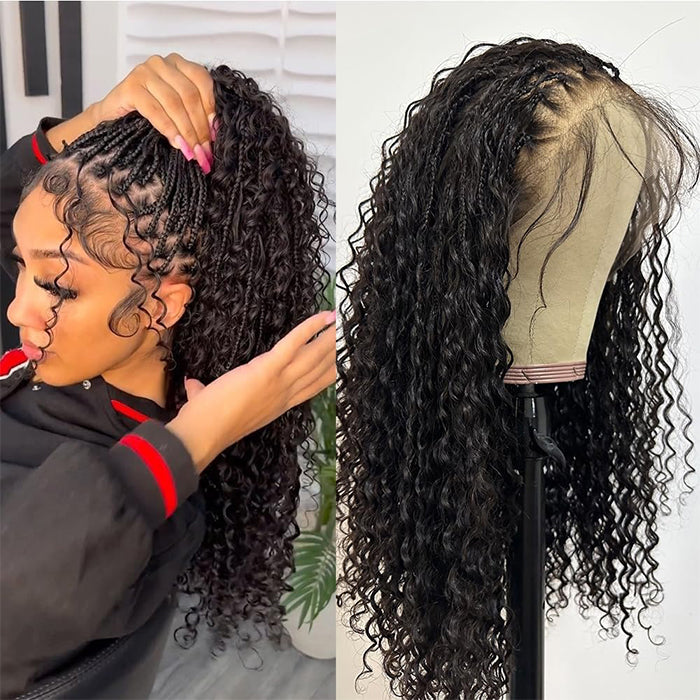
Step 11: Put on your wig

Congratulations - you've completed the bald cap method! Now it's time to install your wig and show off that flawless look. To do this, grasp the wig firmly from both sides and carefully pull it over your head until it sits in place. Make sure that everything is straight and secured before styling for maximum effect. Now you're ready to rock that beautiful look!
Bald Cap Method Wig Install Videos
FAQ
How long does it take to do a bald cap?
Creating a beautiful bald cap look requires focus and attention to detail. However, the amount of time varies from person to person. Depending on your hair type, desired results, and budget available for the project, you can expect it may take between 45 minutes and up to an hours for application. Taking your time throughout each step will guarantee that you achieve an amazing finished product! So don't be scared; with some dedication and effort, you'll have no problems creating something spectacular in no time.
How many times you can use a wig cap?
It is disposable generally, especially if you choose the bald cap method to install your wig. The wig cap is trimmed already, they are hard to use again.
In a Nutshell
So, if you're looking for a way to achieve flawless results with your wig every time, look no further than the bald cap method. With its ability to provide a custom fit and smooth finish, this is undoubtedly one of the best ways to keep your hair in place beneath a wig. With a few simple steps and some basic supplies, you can create a look that is sure to turn heads. Best of luck!


Leave a comment